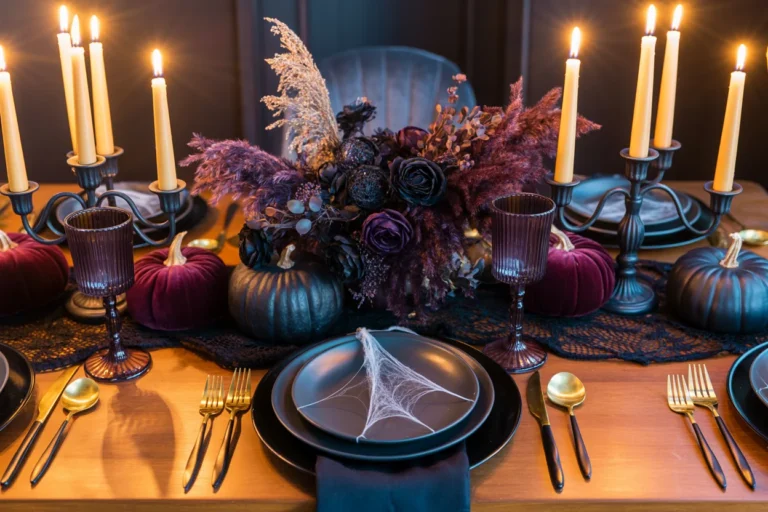
25 Halloween Kitchen Decor Ideas for a Spooky Space
Halloween Kitchen Decor Ideas can make even an everyday cooking space feel festive without sacrificing its function. From pumpkin displays and spooky mugs to witchy corners, seasonal wall art, and moody lighting, there are plenty of ways to decorate counters, shelves, islands, and dining areas.
These ideas work for homeowners, renters, apartment dwellers, and families who want an easy seasonal refresh. Whether your style leans cute, rustic, elegant, or eerie, the key is choosing a few well-placed pieces that complement your existing kitchen instead of crowding the surfaces.
1. Spooky Coffee Station

A coffee station gives you a natural spot for seasonal decorating because the display already has a defined purpose. Start with a small tray or wooden riser beneath the coffee maker, then add a black mug, miniature pumpkins, a Halloween sign, and a small faux branch. A dark ceramic canister can hold coffee pods while keeping the setup tidy.
Keep the display compact enough to leave room for daily coffee-making. A tray around 12 to 16 inches wide is usually enough for the essentials without taking over the counter. Warm wood, matte black finishes, and muted orange accents create a cozy seasonal palette that works particularly well with neutral kitchens.
2. Mini Pumpkin Countertop

- Best Surface: Kitchen counters, coffee bars, or a narrow console.
- Color Palette: White, cream, muted orange, sage green, and black.
- Materials: Ceramic pumpkins, real mini pumpkins, wood, and stone.
- Arrangement: Group three to five pumpkins in different sizes rather than spacing them evenly.
- Budget: Low, especially when using small seasonal pumpkins or existing bowls.
A small cluster looks more intentional when the pieces have different heights and finishes. Place the tallest pumpkin toward the back and use a shallow bowl or cutting board underneath to visually connect the group. Leave clear space around prep areas so the display stays decorative rather than inconvenient.
3. Halloween Tiered Tray

Quick Tip: Use each level of a tiered tray for a different visual layer. Place a small sign or mug on the back, medium pumpkins in the middle, and tiny decorative pieces toward the front.
A black metal or natural wood tray can sit on a kitchen island, breakfast counter, or coffee station. Mix orange, cream, and black accessories rather than filling every level with the same color. Small faux leaves, miniature signs, and wrapped candy containers add texture without requiring much space. A tiered tray is also easy to move when you need the counter for cooking.
4. Open Shelf Halloween Display

BEFORE
Open kitchen shelves can look unfinished when everyday dishes are arranged without any seasonal accents. A completely neutral shelf may also lack the visual contrast that makes autumn decorating feel noticeable.
AFTER
Add a few black plates, orange mugs, miniature pumpkins, and small Halloween signs among your regular dishes. Keep the tallest pieces toward the back and place smaller accents in front so the display remains layered without blocking useful items.
For a polished result, repeat one or two Halloween colors across the shelves rather than changing the palette from one level to another. Leave some open space between groups so the shelving still feels like functional kitchen storage.
5. Black and Orange Towels

- Choose two or three kitchen towels in complementary Halloween colors, such as black, burnt orange, cream, or deep brown.
- Hang one from the oven handle and place another near the sink where it is easy to reach.
- Add a subtle pattern, such as pumpkins, bats, stripes, or small geometric motifs.
- Keep highly decorative towels away from messy prep areas if they are not intended for everyday use.
This is one of the simplest ways to introduce seasonal color without adding objects to your counters. Cotton or cotton-blend towels are practical for everyday kitchens, while a woven or textured towel can add visual interest. Rotate decorative towels out when they become stained or heavily used.
6. Halloween Mug Collection
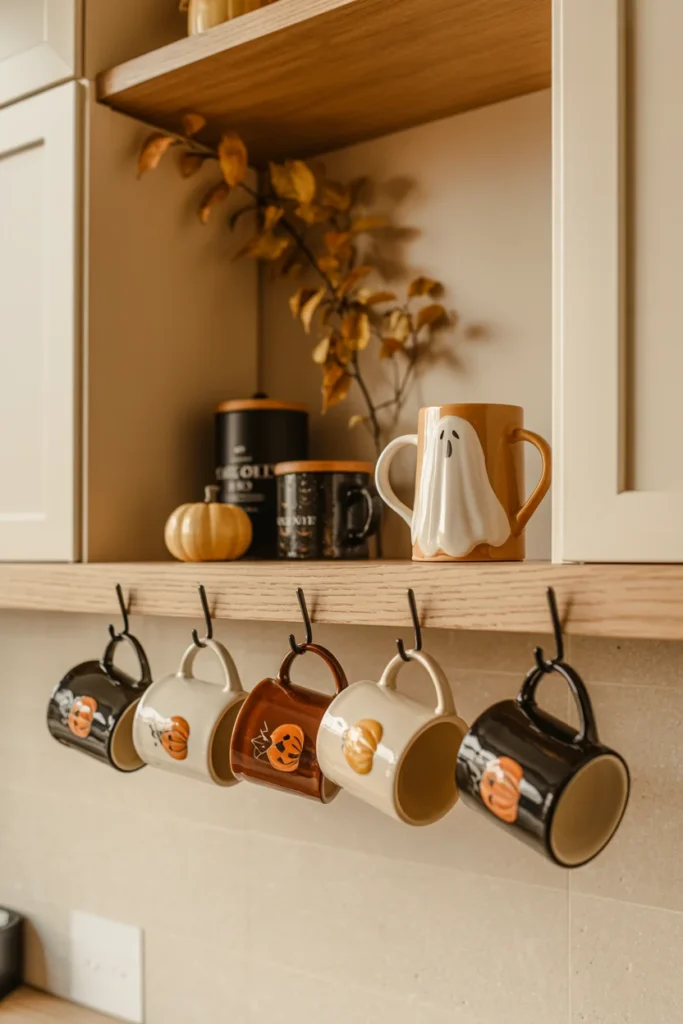
| Feature | Individual Mugs | Grouped Mug Display |
| Visual Feel | Subtle | More decorative |
| Space Needed | Very little | Moderate |
| Storage | Uses existing hooks or shelves | Requires a defined display area |
| Best For | Minimal seasonal styling | Noticeable Halloween themes |
A few themed mugs can introduce Halloween character while remaining useful. Display them on hooks, an open shelf, or beside the coffee maker. For a more coordinated look, choose mugs that share one color family even if their patterns are different. This keeps the collection connected to the rest of the kitchen.
7. Witchy Kitchen Corner

DO
- Use a small black cauldron as a decorative container.
- Add a few faux herbs, dried stems, or dark florals.
- Include one witch hat, broom detail, or vintage-style sign.
- Keep the arrangement against a backsplash or unused corner.
DON’T
- Block electrical outlets or appliance controls.
- Fill the entire corner with unrelated Halloween props.
- Place flammable decorations close to the stove.
- Use oversized pieces that interfere with food preparation.
A witch-inspired corner works best when it feels like a small vignette rather than a full themed installation. Black, charcoal, deep green, and warm wood create a slightly mysterious palette. A narrow tray can define the area and make it easy to remove when the kitchen needs extra workspace.
8. Pumpkin Kitchen Island

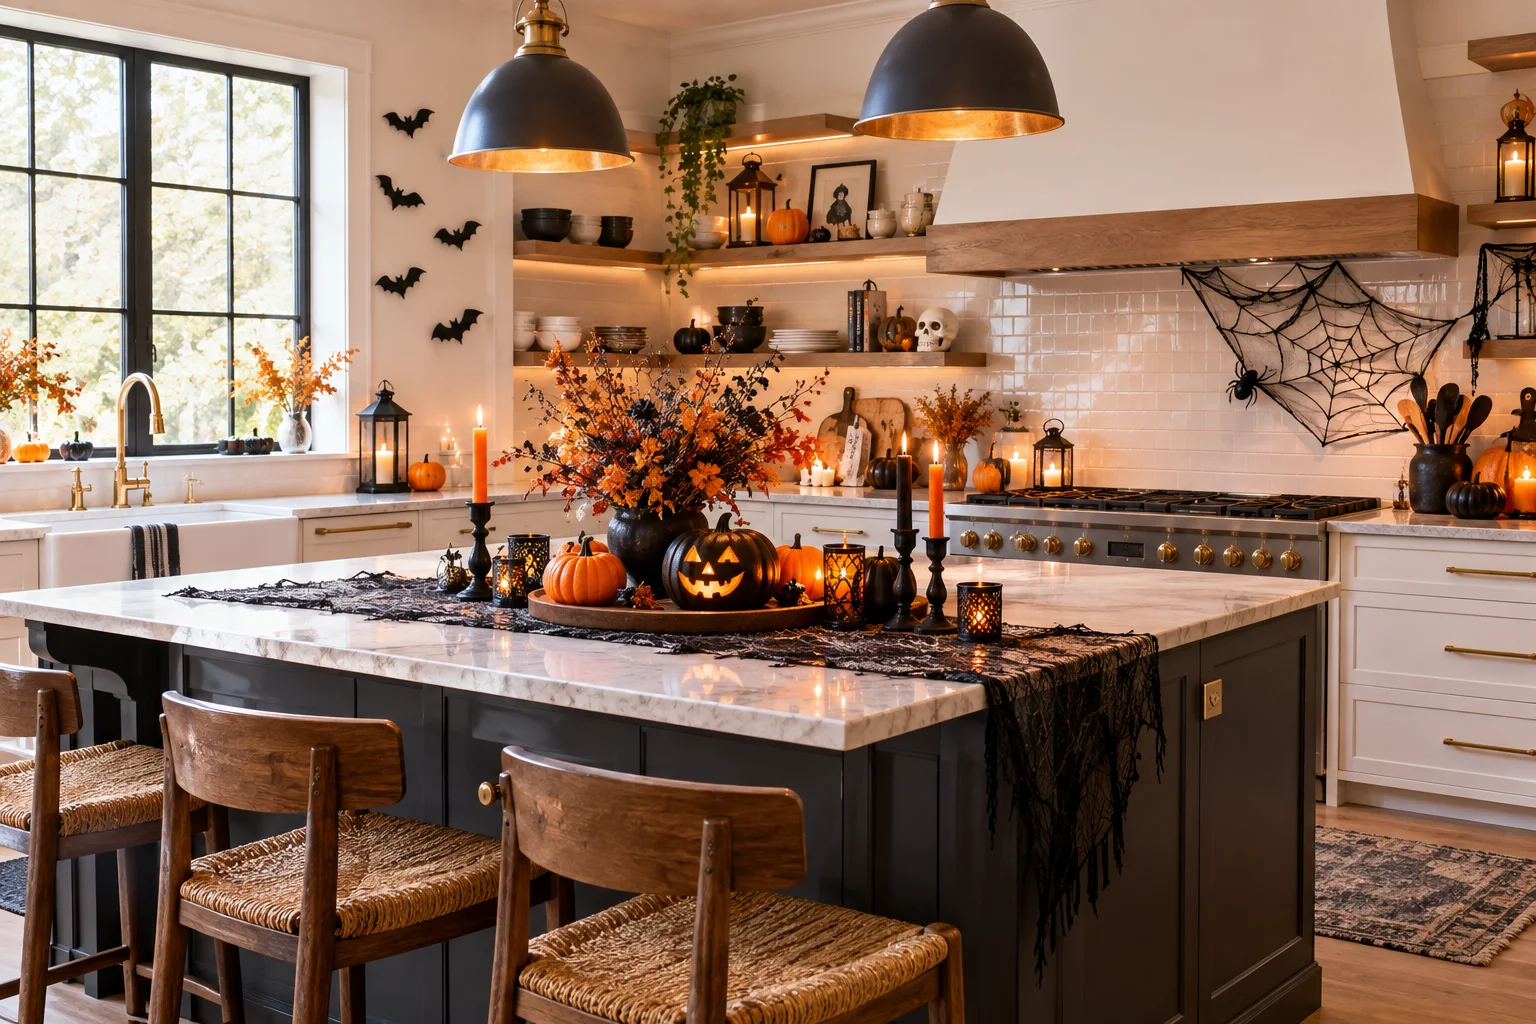
Room: Kitchen with a central island or peninsula
Space Needed: A small central section of countertop
Budget: Low to moderate
Difficulty: Beginner
Best For: Open kitchens and family gathering spaces
Color Palette: Orange, cream, black, and natural wood
Place a shallow tray or long wooden board along the center of the island, then arrange pumpkins, candles, faux leaves, and one or two seasonal accessories. Keep the arrangement low enough to preserve sightlines across the kitchen. If the island doubles as a dining or prep surface, choose pieces that can be moved together in seconds.
See Also 24 Halloween Mantel Decor Ideas for a Spooky & Stylish Home
9. Spooky Wall Art

An unused kitchen wall can become a seasonal focal point with a small collection of Halloween prints. Look for black-and-white illustrations, vintage pumpkin artwork, botanical drawings, bats, ravens, or simple typography. A set of two or three frames often feels more balanced than one oversized piece in a compact kitchen.
Position artwork where it will not compete with cabinets, appliance doors, or frequently used work areas. In a larger kitchen, a narrow vertical arrangement can fill unused wall height without requiring bulky furniture. Removable adhesive hooks are useful for renters, provided the wall surface is suitable.
10. Faux Spider Web Cabinets
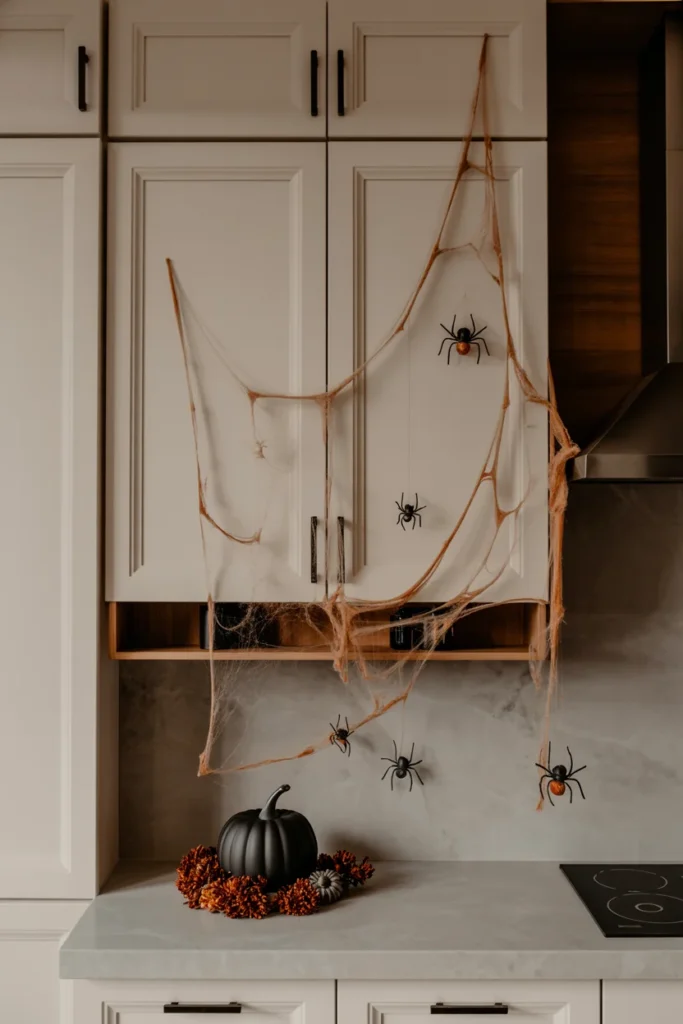
Quick Tip: Keep faux webbing thin and uneven rather than stretching a thick layer across the entire cabinet. The goal is to create small areas of texture around handles, corners, or upper cabinet edges.
Lightly placed webbing works particularly well on dark or white cabinets because the contrast makes it visible. Add a few lightweight faux spiders for detail, but keep handles and hinges clear so the cabinets remain easy to use. Remove the webbing carefully after the season to avoid leaving fibers or residue around hardware.
11. Black and White Display

BEFORE
A kitchen with a neutral palette can sometimes feel disconnected from colorful seasonal accessories. Adding bright orange everywhere may also clash with existing countertops, cabinets, or appliances.
AFTER
Build the Halloween display almost entirely from black and white pieces, then introduce one or two small orange accents. Black ceramic pumpkins, white dishes, monochrome signs, striped towels, and dark candle holders create a cohesive arrangement without changing the kitchen’s existing palette.
This approach suits modern, farmhouse, Scandinavian, and minimalist kitchens particularly well. Use texture to prevent the display from looking flat. Matte ceramics, woven textiles, glass, and natural wood provide variation while keeping the colors consistent.
12. Skeleton and Skull Accents

- Small Skulls: Place ceramic or resin skulls on shelves, trays, or beside seasonal dishes.
- Skeleton Detail: Use a small seated skeleton near a coffee station or breakfast nook.
- Material Mix: Combine white skulls with black ceramic, wood, and aged-metal accessories.
- Placement: Keep figures away from cooking surfaces and areas where food is prepared.
- Scale: Choose compact pieces for counters and slightly larger ones for open shelving.
Skeleton decorations can make the kitchen feel more playful without requiring a complete theme. For family-friendly decorating, choose simple skull shapes rather than overly realistic designs. A limited number of figures also keeps the kitchen functional and prevents the seasonal display from becoming visually crowded.
13. Above-Cabinet Halloween Decor

Use the space above kitchen cabinets for lightweight seasonal pieces that do not interfere with cabinet doors. Black lanterns, faux pumpkins, small signs, dried branches, and fabric bats can create a continuous Halloween display across a long cabinet run.
Measure the available height before buying anything so the arrangement does not look cramped. A few larger pieces usually read better from floor level than many tiny decorations. Since this area tends to collect dust, use washable or easy-to-clean materials and avoid delicate pieces that are difficult to remove.
14. Halloween Kitchen Runner
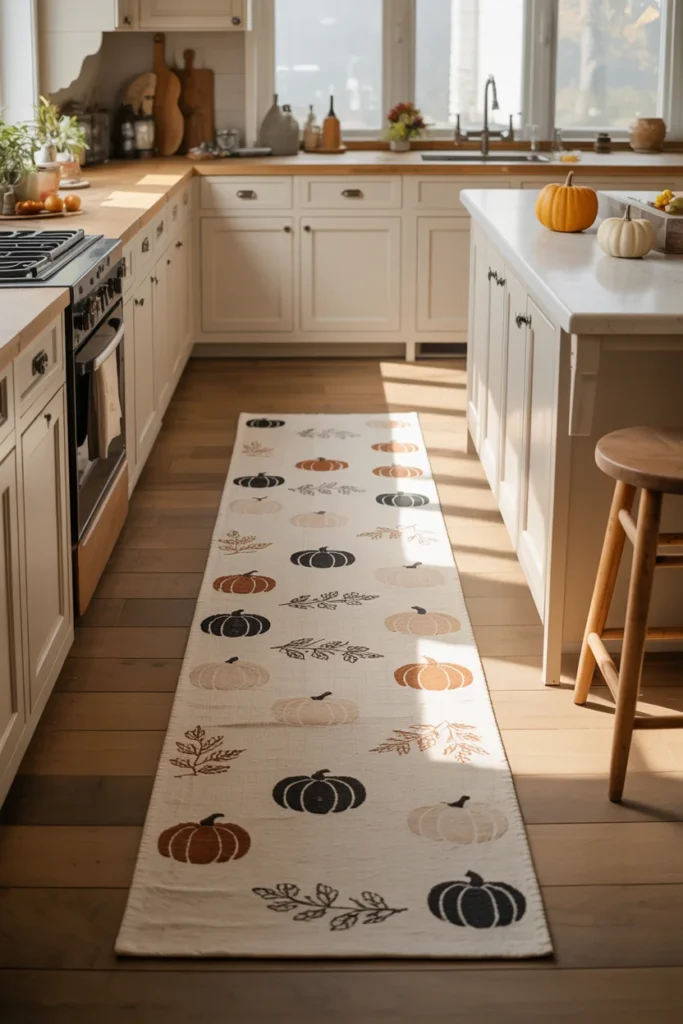
A seasonal runner can change the mood of the kitchen without adding anything to the countertops. Choose a washable runner with pumpkins, subtle bats, black-and-cream stripes, or a muted autumn pattern. A low-pile design is practical because it is less likely to interfere with cabinet doors.
For a galley kitchen, center the runner within the walking path and leave enough clearance around appliances and cabinet doors. In a larger kitchen, a runner can define the working zone between an island and the main cabinetry. Check the manufacturer’s care instructions before using it in a high-traffic area.
15. Cute Pumpkin Kitchen
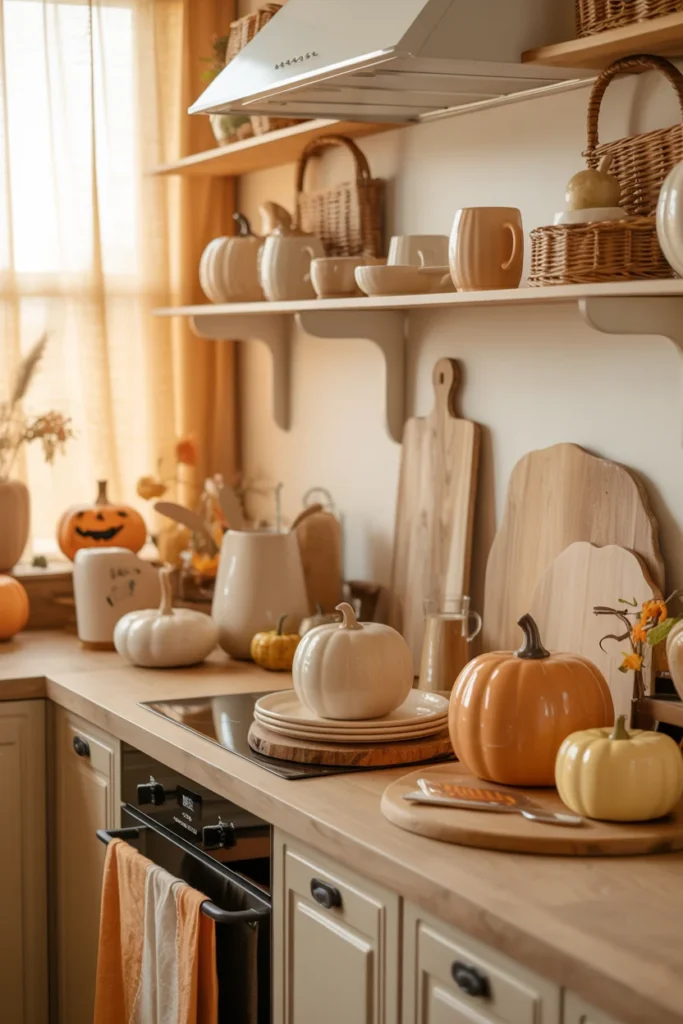
- Start with a soft palette of cream, pale orange, warm beige, and small touches of black.
- Add ceramic pumpkins to the countertop, shelves, or windowsill.
- Introduce pumpkin-patterned towels or mugs for a repeating motif.
- Use natural wood cutting boards and woven baskets to soften the seasonal colors.
- Finish with a small sign or framed print rather than adding decorations to every surface.
A cute pumpkin theme works well for kitchens that need a cheerful rather than spooky Halloween mood. Keep the shapes rounded and the colors warm, especially if the room already has farmhouse or cottage-style elements. Real pumpkins can also work, but wipe them clean and place them on a tray to protect porous surfaces.
16. Spooky Baking Station

| Feature | Open Baking Display | Contained Baking Setup |
| Storage | Ingredients remain visible | Most items stay organized |
| Look | Casual and decorative | Cleaner and more streamlined |
| Best For | Open shelves and counters | Smaller kitchens |
| Seasonal Detail | Jars, signs, themed mugs | Labels, towels, small pumpkins |
Turn a baking area into a seasonal station with glass jars, black-and-orange labels, Halloween cookie cutters, a themed mug, and a small pumpkin. Keep frequently used ingredients within easy reach while placing decorative pieces toward the back. A wooden tray can group the supplies and make the entire station easier to move.
17. Halloween Kitchen Garland

DO
- Drape a short garland across open shelving or the front of a kitchen island.
- Choose felt, paper, wood, or fabric pieces that are lightweight.
- Repeat colors already used elsewhere in the room.
- Keep the garland above work surfaces where possible.
DON’T
- Hang it close to burners, toaster ovens, or other heat sources.
- Allow loose ends to hang near appliance controls.
- Cover cabinet handles or obstruct doors.
- Use an oversized garland in a narrow kitchen.
Garlands work best when they define an existing architectural feature rather than covering the entire kitchen. A short strand across a shelf or window can provide enough seasonal detail. For a cleaner look, select one material and repeat it instead of combining several competing garlands.
18. Moody Candlelight

Room: Kitchen, breakfast nook, or dining area
Lighting: Warm LED candles or battery-operated lanterns
Materials: Glass, ceramic, metal, and wood
Mood: Dark, warm, and atmospheric
Best Placement: Shelves, trays, or dining surfaces away from heat
Battery-operated candles are a practical choice for seasonal kitchen decorating because they provide a warm glow without an open flame. Place several at different heights inside glass holders or lanterns. Keep the lighting low and concentrated around the display rather than trying to illuminate the entire room with decorative candles.
19. Halloween Treat Display

Quick Tip: Create a dedicated treat zone instead of scattering candy containers around the kitchen. A tray with one larger bowl, two small jars, and a seasonal sign can look organized while making treats easy to access.
Use clear glass jars for wrapped candy, a ceramic bowl for cookies, and a small riser to create height. Orange and black sweets can reinforce the color scheme, while neutral containers keep the arrangement useful after Halloween. Keep the display away from direct sunlight and heat-producing appliances to protect chocolate and other temperature-sensitive treats.
20. Witch Hats and Cauldrons

BEFORE
A large kitchen can sometimes make a few small Halloween decorations feel disconnected. Placing unrelated items around the room may create visual clutter without establishing a clear theme.
AFTER
Group witch hats and cauldron accents into one intentional vignette. A small cauldron can sit on a wooden board with faux herbs, a black candle holder, and a miniature pumpkin. A hanging witch hat can add vertical height above the arrangement.
Choose one location for the theme rather than repeating hats and cauldrons across every surface. This creates a recognizable Halloween corner while leaving the rest of the kitchen open for everyday cooking and storage.
21. Sink Area Details
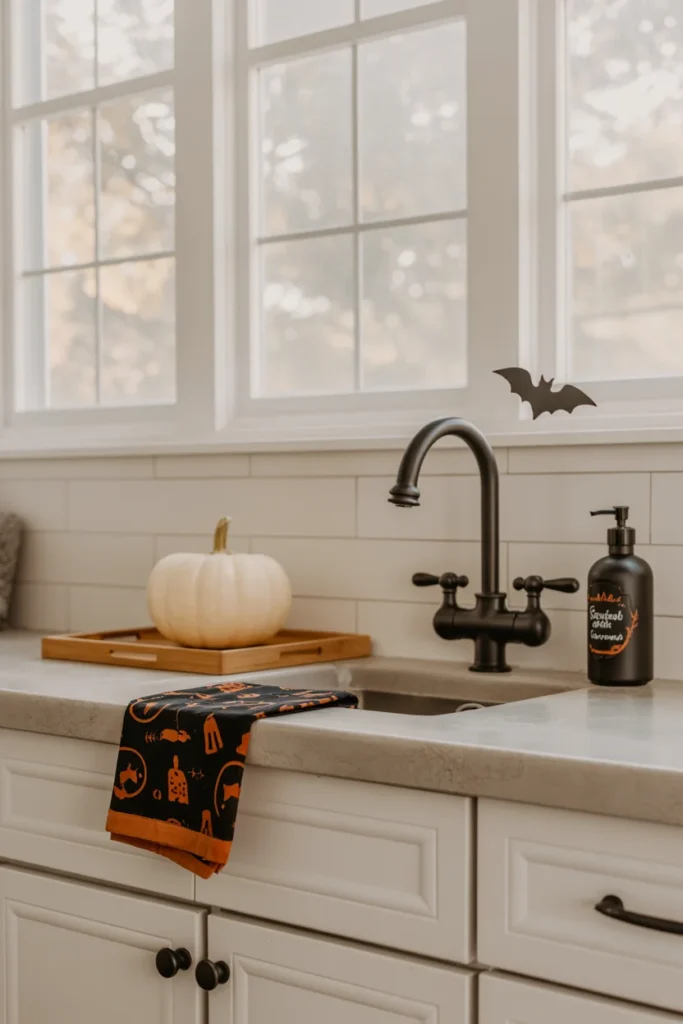
- Clear unnecessary items from the sink surround before adding seasonal accessories.
- Replace everyday hand towels with a Halloween pattern in black, orange, cream, or deep green.
- Place a small pumpkin or ceramic ghost on a waterproof tray beside the sink.
- Add a seasonal soap dispenser if it matches the existing fixtures.
- Keep decorative pieces away from the faucet and areas that receive frequent splashes.
The sink area benefits from decorations that are compact and easy to wipe clean. Ceramic and sealed wood are more practical here than delicate paper decorations. A small tray also helps protect the countertop and visually separates seasonal pieces from soap, sponges, and other daily necessities.
22. Halloween Serving Pieces

| Feature | Halloween Plates | Neutral Serving Pieces |
| Seasonal Impact | High | Subtle |
| Everyday Use | Mostly seasonal | Year-round |
| Storage | Requires dedicated space | Easier to integrate |
| Style | Themed | More flexible |
Halloween plates, bowls, platters, and serving boards can make a kitchen feel festive when used for entertaining. If storage is limited, choose just one statement serving piece and combine it with everyday black, white, or wood pieces. Displaying a platter on an open shelf can also make it part of the seasonal decor when it is not being used.
23. Rustic Halloween Kitchen

DO
- Combine natural wood with muted orange pumpkins.
- Add woven baskets and aged-metal details.
- Use cream ceramics to soften darker accents.
- Include dried branches or seasonal foliage.
DON’T
- Overuse bright orange across every surface.
- Mix too many artificial textures.
- Hide useful storage behind bulky decor.
- Place untreated natural materials where they can get wet.
A rustic Halloween kitchen feels warm when seasonal decorations connect with existing materials rather than competing with them. Wood cutting boards, woven baskets, linen towels, and ceramic pumpkins create layers of texture. Keep the palette grounded with brown, cream, charcoal, and muted orange for a relaxed autumn feel.
24. Haunted Moody Lighting

Room: Kitchens with limited decorative lighting
Main Effect: Warm pools of light and stronger shadows
Budget: Low to moderate
Difficulty: Beginner
Best For: Evening entertaining and seasonal displays
Useful Materials: LED candles, lanterns, warm bulbs, and small lamps
Change the atmosphere by replacing very cool decorative bulbs with warmer lighting where appropriate. Small LED lanterns can highlight a shelf or countertop display, while under-cabinet lighting can provide practical illumination for food preparation. Keep work areas adequately lit and reserve the darker effect for decorative zones rather than reducing visibility throughout the room.
25. Everyday Halloween Style

A seasonal kitchen does not need to look completely different from the rest of your home. Start with the existing cabinet color, countertop material, and hardware, then introduce a few Halloween pieces that share those tones. For example, black accents can complement dark hardware, while cream pumpkins can work with light cabinets.
Keep everyday kitchen essentials accessible and use seasonal decor around them. A black mug beside the coffee maker, a small pumpkin on a wooden board, or a Halloween towel near the sink may be enough to establish the theme. The most practical approach is to decorate the areas that naturally attract attention while leaving work zones clear.
How to Make Halloween Kitchen Decor Look Stylish
The most successful seasonal kitchens usually rely on editing rather than filling every available surface. Choose two or three Halloween colors and repeat them throughout the room. Black, cream, muted orange, natural wood, and deep green are easy to combine with existing kitchen finishes.
Pay attention to scale. A large island can handle a longer centerpiece, while a narrow counter looks better with a small tray or three-piece arrangement. Keep decorative objects away from stovetops, hot appliances, sinks that splash heavily, and food preparation areas.
Layering also helps. Combine different heights, such as a small pumpkin beside a taller vase or framed sign. Mix smooth ceramic with woven fabric, wood, glass, or metal to add texture without adding too many objects.
For renters, focus on removable wall art, countertop accessories, towels, mugs, and battery-operated lighting. These can create a strong seasonal effect without permanent changes. If you have limited storage, choose decorations that can serve more than one purpose, such as seasonal serving pieces or reusable trays.
Most importantly, leave enough clear workspace for cooking. Halloween decorating should complement the kitchen’s daily function, not make ordinary tasks harder.
Conclusion
Halloween kitchen decorating can be as simple or detailed as your space allows. A few pumpkins on the counter, themed towels, a decorated coffee station, seasonal mugs, or a small wall display can create a noticeable change without taking over the room. Larger kitchens can accommodate island centerpieces, open-shelf displays, garlands, and dedicated treat stations.
The best Halloween Kitchen Decor Ideas are the ones that work with your existing layout, colors, storage, and daily routines. Choose pieces that suit your budget and decorating style, keep work areas clear, and use repetition to create a cohesive look. Save this article on Pinterest for your seasonal decorating plans, and share it with someone who enjoys giving their kitchen a Halloween refresh.
Frequently Asked Questions
How can I decorate my kitchen for Halloween?
Start with areas that naturally attract attention, such as the coffee station, kitchen island, open shelves, sink area, and countertops. Add pumpkins, themed towels, mugs, small signs, seasonal dishes, or subtle lighting. Keep decorations grouped into small arrangements instead of spreading individual pieces across every surface.
What are easy Halloween kitchen decor ideas?
Some of the easiest options include changing kitchen towels, displaying Halloween mugs, adding mini pumpkins to a tray, styling a tiered tray, placing seasonal artwork on the wall, or creating a small treat station. These updates require little space and can usually be removed quickly after the holiday.
How can I decorate a small kitchen for Halloween?
Use vertical and existing storage areas rather than adding bulky objects. Open shelves, cabinet tops, windowsills, wall art, hanging towels, and a small coffee station can all provide decorating opportunities. Choose compact pieces and keep the main preparation surfaces clear.
What colors work well for Halloween kitchen decor?
Traditional orange and black work well, but they are not the only choices. Cream, white, brown, deep green, charcoal, muted orange, and natural wood can create a softer seasonal palette. Choose colors that complement your existing cabinets, counters, flooring, and hardware.
How can I make Halloween kitchen decor look elegant?
Limit the color palette and repeat a few carefully selected materials. Black ceramic, cream pumpkins, natural wood, glass, and warm lighting can create a refined seasonal look. Avoid overcrowding the counters and choose a few larger or better-coordinated pieces instead of many unrelated decorations.